
User Guide
Add a New Scan Playbook
Overview
Recall that once you have identified the sources you wish to scan for sensitive data, added and configured them to Sensitive Data Platform, you next create decision trees (Playbooks) that Sensitive Data Platform uses to act upon the sensitive data it finds.
-
Playbooks define the plan and actions that you can take on the results of your sensitive data scans
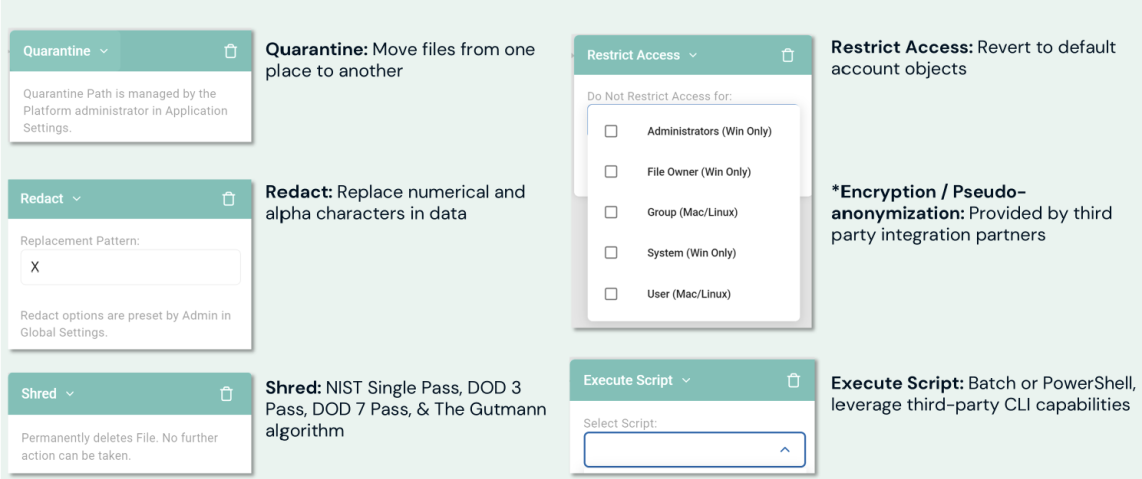
See the available playbook remediation actions in the "Playbook Actions" graphic below:
-
Quarantine - Move files from one location to another location
-
Redact - Replace numerical and alpha characters in data with generic characters such as 'X' or '#'
Unredacted vs. Redacted Text Example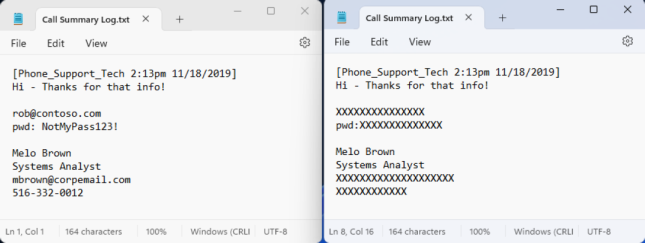
-
Shred - Permanently deletes file. Data sanitation techniques include: NIST Single Pass, DOD 3 Pass, and The Gutmann algorithm
-
Restrict Access - Restrict access to all but select groups (Administrators, file owner, etc.)
-
Encryption/Pseudo-anonymization - Provided by third-party integration partners
-
Execute Script - Batch or PowerShell script. This enables you to leverage third-party CLI capabilities
Playbook Actions
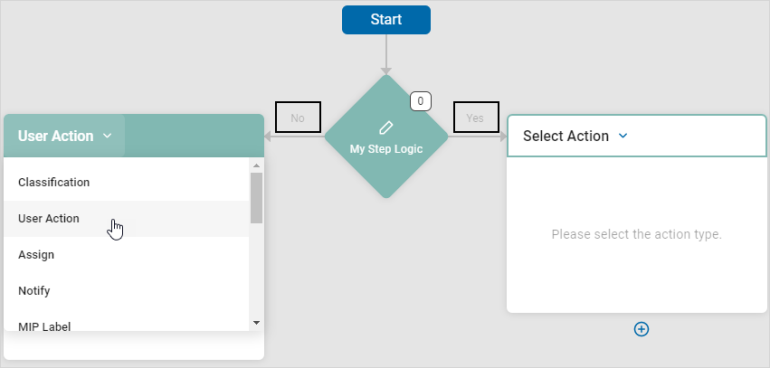
How to Add a New Scan Playbook
To add a new Scan Playbook:
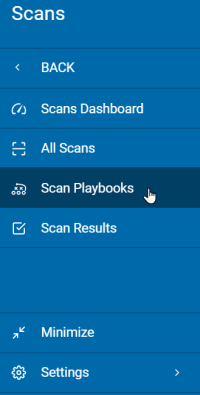
- From the left menu, click Scans.
- Select Scan Playbooks.
- In the top right of the screen, click Actions.
- Click Add Playbook.
- In the New Playbook pop-up window, type the name and description of the playbook.
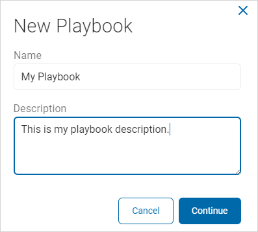
- Click Continue to create or Cancel to discard.
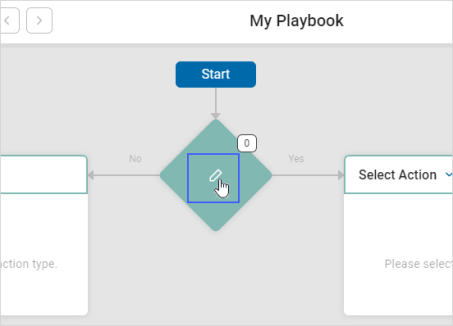
- Expand a section for how to do the following steps:
Decision Point
Procedure:
-
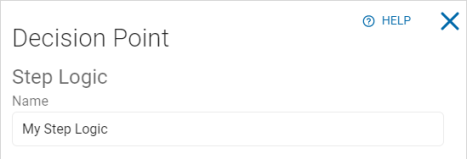
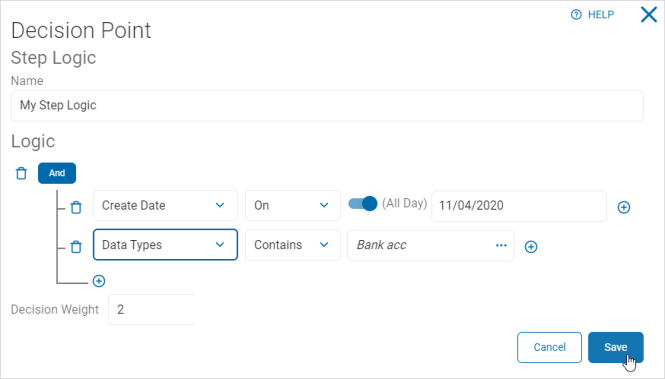
Decision Point: Click the Decision Point icon to open the Decision Point pop-up window.
-
Step Logic: In the Name box, type the name of the step logic.
-
For example: MyStepLogic.
-
-
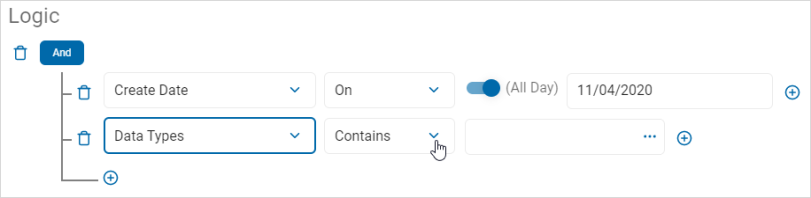
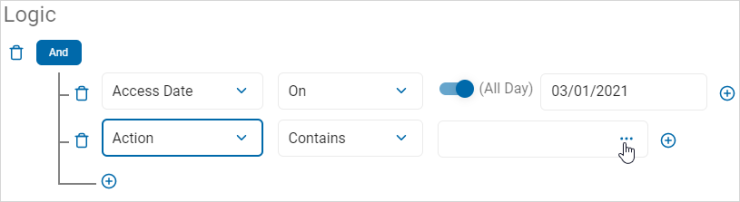
Logic: Set your logic.
-
Left criteria drop-down list: Select an option. For example: Access Data.

-
Center criteria drop-down list: Select an option. (The options available are determined by the initial criteria choice.) For example: On.

-
All Day toggle: Set toggle to On for all day. Set toggle to Off to set a specific Date/Time.
Note: All Day toggle is only available for options that include date and time.
-
Right criteria drop-down list: Fill in as applicable. For example: 03/01/2021.

-
To add a new group containing a filter value plus one additional value, click the plus icon.

-
-
Select options from the left and center criteria drop-down lists as above.
-
In the right criteria box, the available options are dependent on your previous choices.
-
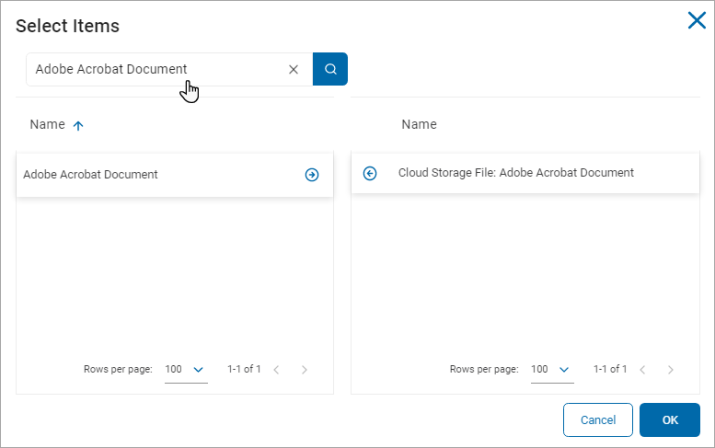
For example: Click the more options menu (...).
-
-
In the Select Items pop-up window, do the following:
-
Type an item to search in the Search box.
-
Click the right arrow to select an item to add.
-
Click the left arrow to remove an item from the list.
-
Click OK to add the criteria or Cancel to discard.
-
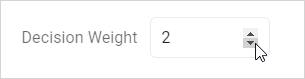
- In the Decision Weight section, use the numeric up-down control to select a weight for the logic statement.
- Click Save to save the logic statement or Cancel to discard.
Note: Adding multiple filter criteria can affect the scan performance.
Note: Not all repositories allow all logic scenarios to be performed so some logic statements will not function.
• For example, many cloud repositories do not track Access Dates.
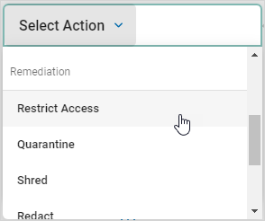
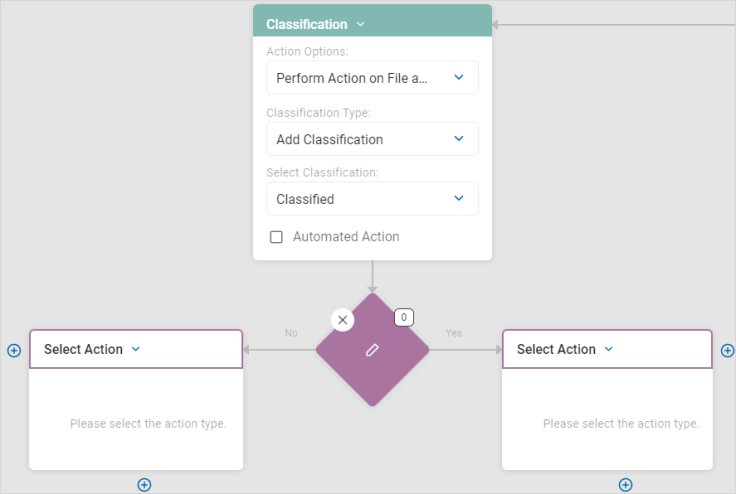
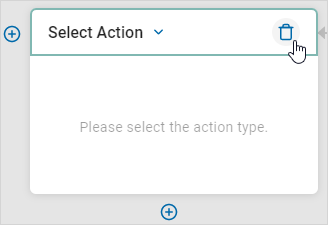
Select Action
Use the following steps to set the Action to take as a result of a Yes or No answer to your step logic criteria:
-
Select options from the Select Action drop-down lists:
-
Step Logic No: Applies the action when a data match is not found.
-
Step Logic Yes: Applies the action when a data match is found.
-
Select Action: Select one option from the drop-down list:
-
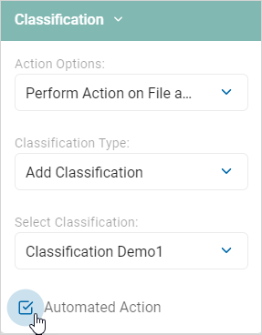
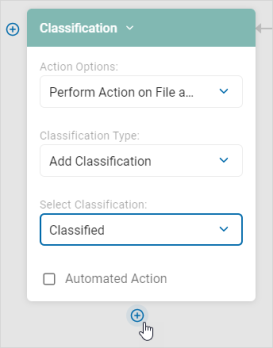
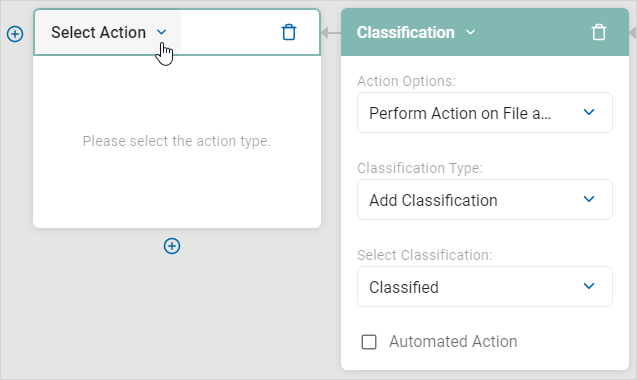
Classification
Procedure:
-
Select Classification from the Select Action drop-down list.
-
Action Options: Select one from the drop-down list:
-
Perform Action on File and Databases
-
Perform Action on Databases Only
-
-
Classification Type: Select one from the drop-down list:
-
New Classification: Adds a new classification to the search results.
-
Remove Classification: Removes a classification from the search results.
-
Replace Classification: Replaces a classification in the search results.
-
-
Select Classification: Select an option from the drop-down list.
-
See Manage Classification to manage classifications.
-
-
Automate Action: Select to apply the action automatically.
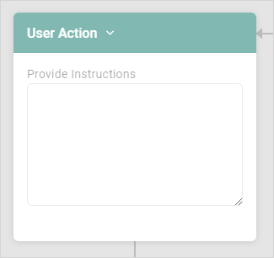
User Action
Procedure:
-
Select User Action from the Select Action drop-down list.
-
In the Provide Instructions box, type the specific user action needed.
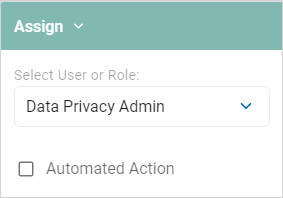
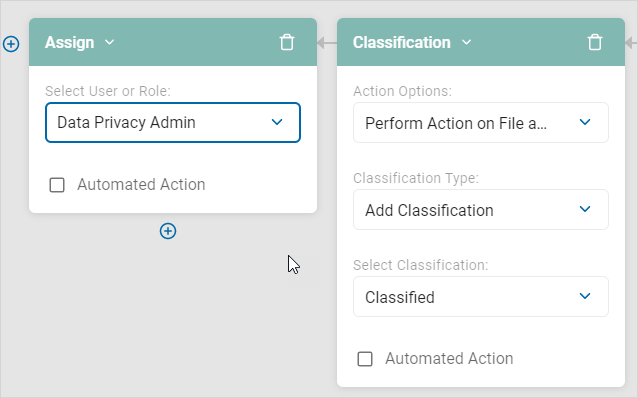
Assign
To assign a user or role:
- Select Assign from the Select Action drop-down list.
- Select User or Role: Select an option from the drop-down list.
- Automated Action: Select to apply the action automatically.
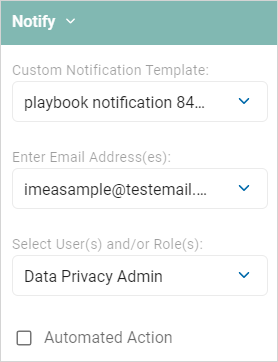
Notify
To notify assignees of results:
- Select Notify from the Select Action drop-down list.
- Custom Notification Template: Select an option from the drop-down list.
- Enter Email Address(es): Type the email address to notify. Click Enter on your keyboard to add multiple email addresses.
- Automated Action: Select to apply the action automatically.
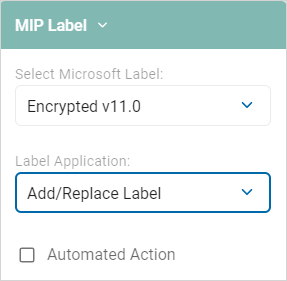
MIP Label
To use Microsoft Information Protection (MIP) labels to apply to the results:
- Select MIP Label from the Select Action drop-down list.
- Select Microsoft Label: Select an option from the drop-down list.
- Label Application: Select an option from the drop-down list.
- Automated Action: Select to apply the action automatically.
Note: This option is requires purchase of a MIP license.
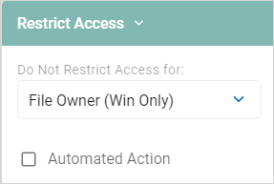
Remediation
Procedure:
- Select an option from the Remediation section of the Select Action drop-down list:
-
Do Not Restrict Access: Select an option from the drop-down list.
-
Automated Action: Select to apply the action automatically.
-
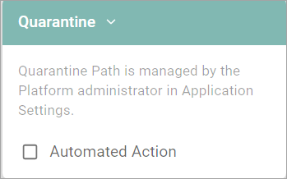
Quarantine: Quarantine paths are managed by the administrators in the Remediation section of the Scans Settings page.
-
Automated Action: Select to apply the action automatically.
-
Shred: Permanently deletes a file. No further action can be taken.
-
Automated Action: Select to apply the action automatically.

-
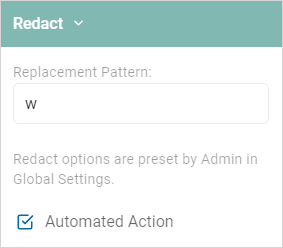
Redact: Redacts the results when the Spirion application is closed.
-
An example of a file with sensitive information redacted (using the 'X' character) is shown below.
-
Redaction settings are managed by the Admin in Platform Settings.
Redaction File Example

-
-
Automated Action: Select to apply the action automatically.
-
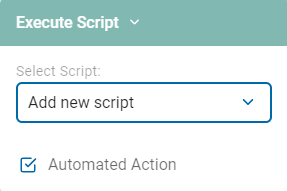
Execute Script: Execute a script if there are results matching this rule.
-
Select an option from the Select Script drop-down list.
-
-
Automated Action: Select to apply the action automatically.
-
Automated Action: Select to apply the action automatically.

-
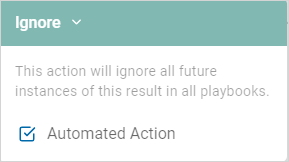
Ignore: Ignore all future instances of a result. Note that if you Ignore a via a Playbook, the Spirion agent reports the data, and then services adds an internal global ignore list so the data is not found again. With appropriate searching or filtering, ignored data is still visible in scan results and reporting. Sensitive data matches added to custom Global Ignore Lists that users create, results in Spirion agents ignoring that data and the data not being sent to the SDP console. The data is therefore not visible in scan results, reporting, or dashboards. See Manage Data Retention Settings
-
Automated Action: Select to apply the action automatically.
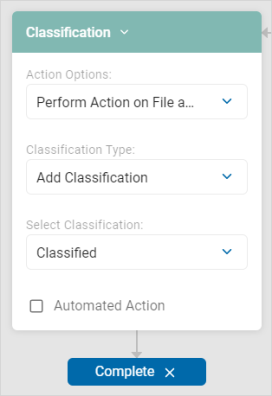
Complete Select Action
To complete a select action section:
- In an existing action, click the plus icon below the action box.
- Select Completed.
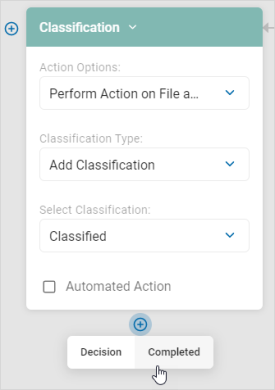
- The action is marked Complete.
-
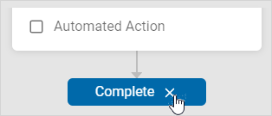
To reopen the action, click the X to the right of Complete.
Add Additional Select Actions
In an existing action, you can add further decision flow below or action to the side:
New Decision
Procedure:
- Click the plus icon at the bottom of the current action.
- Click Decision.
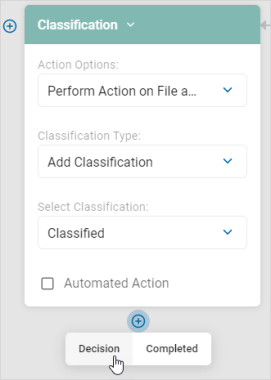
- Write the new step logic as defined in the Decision Point section.
- Select an action from the Select Action drop-down list. See Select Action for more details.
New Adjacent Action:
Procedure:
- Click the plus icon to the side of the current action.
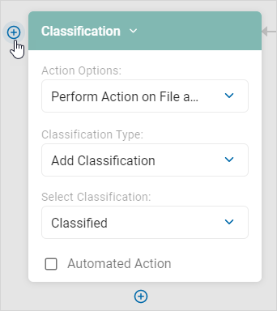
- Select an action from the Select Action drop-down list. See Select Action for more details.
- To delete the new adjacent action, click the trash icon.
Note: To use a Playbook, you must mark all actions complete.
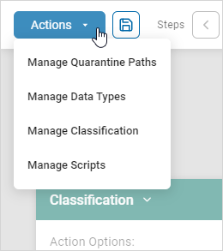
Manage Quarantine Paths
The Manage Quarantine Paths screen enables you to set a specific quarantine path other than the default setting.
To manage a quarantine path:
- In a playbook, click Actions then Manage Quarantine Paths.
- In the Quarantine Paths pop-up window, select one or more options from the drop-down list.
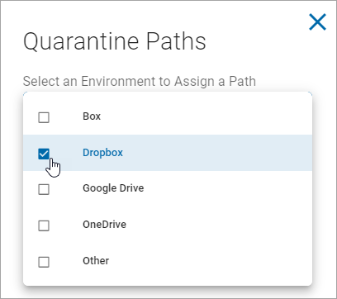
- Click outside of the drop-down list.
- Fill in the selected file paths.
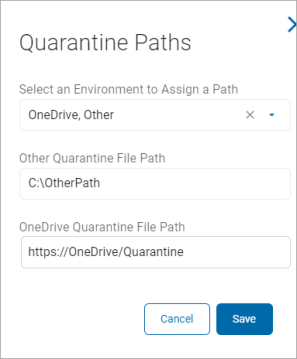
- Click Save to save settings or Cancel to discard.
- See the example below for a local quarantine path of C:\quarantine.
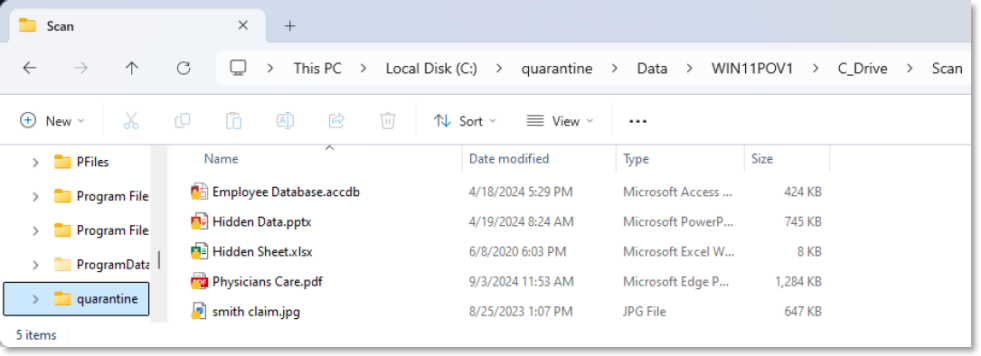
- See the example below for a local quarantine path of C:\quarantine.
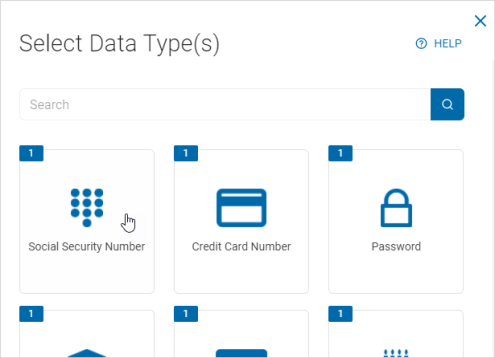
Select Data Types
The Select Data Types pop-up window lists all the existing data types and actions you can take.
Manage Data Types
Procedure:
- In a playbook, click Actions then Manage Data Types.

-
Do one of the following:
- Select a data type tile.
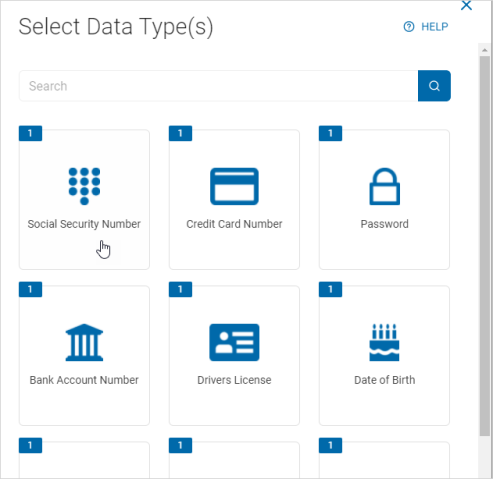
- Type a data type in the search box and select the tile.
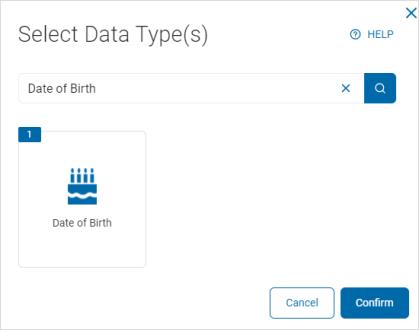
- Select a data type tile.
- Click Confirm to select this data type or Cancel to discard.
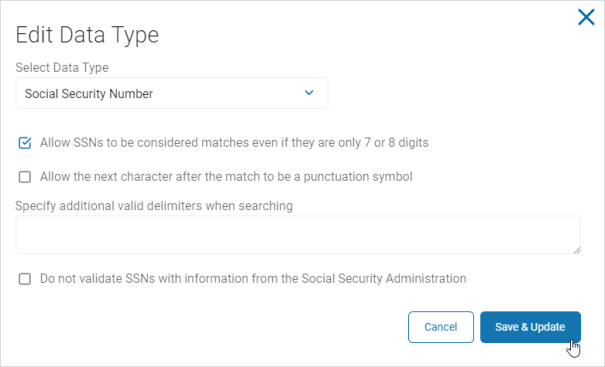
Edit a Data Type
To edit a data type:
- Click a Data Type tile. For example, Social Security Number.
- In the Edit Data Type window, make changes as desired.
Note: Specify additional valid delimiters when searching - In this box enter any additional valid delimiters Sensitive Data Platform encounter when scanning for the specified data type in your environment. A delimiter is a character or sequence of characters that marks the boundary between different parts of data, like a comma in CSV files, a tab, or a space. Delimiters help separate individual items or fields in text or data streams, enabling applications to parse and understand the data's structure
- Click Save & Update to save your changes or Cancel to discard.
- Click Confirm to update the data type or Cancel to discard.
Manage Classification
The Classification screen displays a searchable list of existing classifications.
-
You can view, edit, and add classifications on the screen.
-
See Global Classifications for more information.
Persistent Classification
Spirion can apply persistent metadata tags to supported files automatically via Playbook.
-
This can inform downstream reporting and edge systems about files that are moving around and possibly getting replicated to other systems.
-
It also provides a visual indicator to end users to inform them that a given file has been classified.
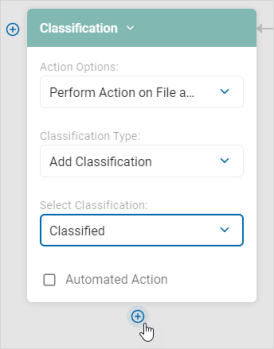
Procedure:
- In a playbook, click Actions then Manage Classification.
- In the pop-up window, select "Perform Action on File...: under Action Options.
- Select an option such as "Add Classification" under Classification Type.
- Select an option such as "Confidential" under Select Classification.
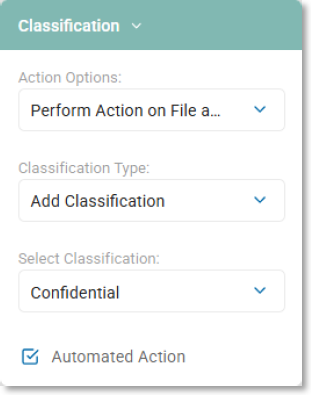
- Click outside of the drop-down list.
- Click Save to save settings or Cancel to discard.
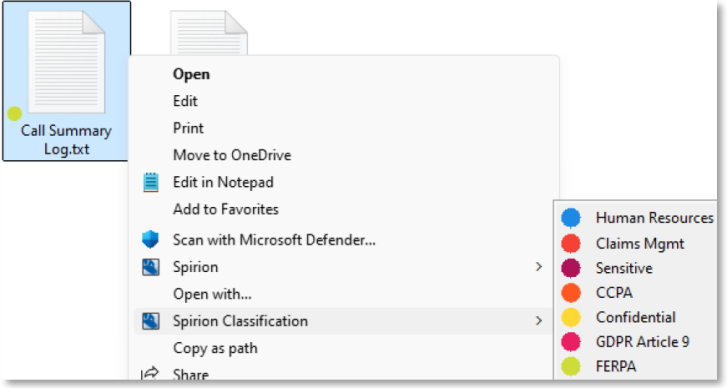
Spirion Classified File Example
You can now classify a file from the Windows file sub-menu as shown below.
Manage Scripts
The Script Repository screen displays a searchable list of existing scripts.
-
You can view, export, delete, and add new scripts.
-
See Working with Script Repository for more information.